

This guide shows how to build Flutter UI components that are dynamically
controlled using feature flags.
🎥 Prefer video? A short YouTube walkthrough is included below.
youtube.com/watch?v=OgC7t6Hun5U&feature=youtu.be
Feature Flags allow you to control the impact of new releases and quickly respond if something goes wrong. Since releasing or rolling back mobile apps requires going through the app store review process, it can be slow and inconvenient.
With Feature Flags in Flutter, you can easily toggle features on or off without needing to publish a new release. In this article, you’ll learn how to implement feature flags in your own Flutter app.
Table of Contents
- Prerequisites
- How to Setup a Flutter Project
- How to Setup Intellitoggle Project with Feature Flag
- Initializing Flutter Flags App
- Directory Structure
- Setting Up Environment Variables
- Setting Up API Services
- Setting Up Flag Key and Feature Flag Provider
- Setting Up UI's for Feature Flagging
- Feature Flagging with Intellitoggle
- Testing Intellitoggle Feature Flags in Flutter App
- Conclusion
Prerequisites
To successfully complete this project, the following prerequisites should be met.
- Install Flutter and Dart SDKs on your local machine. Use the command below to confirm each SDK is installed.
dart --version
flutter --version
- You have a basic knowledge of Dart programming language.
How to Setup a Flutter Project
With the above listed prerequisites fulfilled, we’ll set up a Flutter project with the following steps.
- Run the following command in your terminal:
flutter create flutter_flags_app
- Navigate to your project’s root folder using the command below:
cd flutter_flags_app
How to Setup Intellitoggle Project with Feature Flag
This section covers how to set up Intellitoggle project with Feature Flag which will be used for your Flutter app, flutter_flags_app.
- Navigate to Intellitoggle web app and signup or signin.
- Once signed in, you’ll land on your dashboard. From here, you can create Projects, Environments, and Flags.
- Create a Project, After signing in, a modal pops up to create a New Project.
- Enter a name for your project (e.g., My Flutter App), Select an Environment Setup, Optionally add a description and click Create.
- On the Left Sidebar navigate to Settings, On Settings Menu scroll down and click
Applications - On the new page click, Create OAuth2 Client button.
- Fill in details such as Client Name, Project Name, Environment visibility, Scope, and Date.
- Click the Create Client button.
- Copy the Client ID, Client Secret Code, and other environmental variables and save in a .env file.
Initializing Flutter Flags App
We need to install http, flutter_dotenv and provider
In the root directory of your project flutter_flags_app, install http, flutter_dotenv and provider with the command below to add both packages to your pubspec.yaml under dependencies and also automatically run flutter pub get to download them:
flutter pub add http flutter_dotenv provider
Directory Structure
Here’s a clean directory layout for your Flutter app:
lib/
├── main.dart
├── core/
│   ├── env.dart
│   ├── api_service.dart
│   └── feature_flag_service.dart
├── providers/
│   └── feature_flag_provider.dart
└── ui/
    ├── default_ui.dart
    └── new_ui.dart
Setting Up Environment Variables
Create a file named .env in your project root:
INTELLITOGGLE_API_URL=https://api.intellitoggle.com
INTELLITOGGLE_CLIENT_ID=your_client_id
INTELLITOGGLE_CLIENT_SECRET=your_client_secret
INTELLITOGGLE_TENANT_ID=your_tenant_id
Add .env in pubspec.yaml
flutter:
  assets:
    - .env
Now run flutter pub get to update pubspec.yml file
Make core directory
Create lib/core/env.dart file
This file loads and exposes the .env variables
import 'package:flutter_dotenv/flutter_dotenv.dart';

final apiUrl = dotenv.env['INTELLITOGGLE_API_URL']!;
final clientId = dotenv.env['INTELLITOGGLE_CLIENT_ID']!;
final clientSecret = dotenv.env['INTELLITOGGLE_CLIENT_SECRET']!;
final tenantId = dotenv.env['INTELLITOGGLE_TENANT_ID']!;
Setting Up API Services
Create lib/core/api_service.dart file
Handles HTTP requests for tokens and flag evaluations.
import 'dart:convert';
import 'package:http/http.dart' as http;
import 'env.dart';

class ApiService {
  final String baseUrl = apiUrl;

  /// Get or refresh access token
  Future<String> getAccessToken() async {
    final response = await http.post(
      Uri.parse('$baseUrl/oauth/token'),
      headers: {'Content-Type': 'application/x-www-form-urlencoded'},
      body:
          'grant_type=client_credentials'
          '&client_id=$clientId'
          '&client_secret=$clientSecret'
          '&scope=flags:read flags:evaluate',
    );

    if (response.statusCode == 200) {
      final data = jsonDecode(response.body);
      return data['access_token'];
    } else {
      throw Exception('OAuth2 failed: ${response.body}');
    }
  }

   /// Evaluate a feature flag
   Future<Map<String, dynamic>> evaluateFlag({
       required String flagKey,
       Map<String, dynamic>? context,
     }) async {
       final token = await getAccessToken();

       final url = '$baseUrl/api/flags/$flagKey/evaluate';

       final response = await http.post(
          Uri.parse(url),
          headers: {
            'Authorization': 'Bearer $token',
            'X-Tenant-ID': tenantId,
            'Content-Type': 'application/json',
          },
         body: jsonEncode(context ?? {}),
        );

       if (response.statusCode == 200) {
         return jsonDecode(response.body);
       } else {
           throw Exception('Flag evaluation failed: ${response.body}');
      }
   }
}
Create lib/core/feature_flag_service.dart file
Wraps logic for getting boolean flag values.
import 'api_service.dart';

class FeatureFlagService {
  final ApiService _api = ApiService();

    /// Get boolean flag value
Future<bool> getBooleanFlag({
  required String flagKey,
  required String projectId,
  bool defaultValue = false,
  Map<String, dynamic>? context,
}) async {
  try {
    final result = await _api.evaluateFlag(
      flagKey: flagKey,
      context: context,
    );

    // Extract the "value" field from API response
    final flagValue = result['value'];

    if (flagValue is bool) {
      return flagValue;
    } else {
      print('Unexpected flag value type: ${flagValue.runtimeType}');
      return defaultValue;
    }
  } catch (e) {
    print('Error evaluating boolean flag: $e');
    return defaultValue;
  }
 }
}
Setting Up Flag key and Feature Flag Provider
Make stores directory
Create lib/stores/flags.dart file
Flag store to manage flag keys.
const String showNewDashboardUIFlag = 'new-dashboard-ui';
Make providers directory
Create lib/providers/feature_flag_provider.dart file
Provider to manage flag state and notify listeners.
import 'package:flutter/material.dart';
import '../core/feature_flag_service.dart';
import "../stores/flags.dart";

class FeatureFlagProvider with ChangeNotifier {
  final FeatureFlagService _flagService = FeatureFlagService();

  bool? isEnabled;
  bool isLoading = false;

  Future<void> loadFlag() async {
    isLoading = true;
    notifyListeners();

    isEnabled = await _flagService.getBooleanFlag(
      flagKey: showNewDashboardUIFlag,
      defaultValue: false,
    );

    isLoading = false;
    notifyListeners();
  }
}
Setting Up UI's for Feature Flagging
Make ui directory
Create lib/ui/default_ui.dart file
Default UI which is showed when the Feature Flag is disabled.
import 'package:flutter/material.dart';

class DefaultUI extends StatelessWidget {
  const DefaultUI({super.key});

  @override
  Widget build(BuildContext context) {
    return Scaffold(
      appBar: AppBar(title: const Text('Feature Flag Demo')),
      body: Center(
        child: Text(
          'Default Dashboard UI',
          style: TextStyle(fontSize: 24, color: Colors.redAccent),
        ),
      ),
    );
  }
}
Create lib/ui/new_ui.dart file
UI showned when the Feature Flag is enabled.
import 'package:flutter/material.dart';

class NewUI extends StatelessWidget {
  const NewUI({super.key});

  @override
  Widget build(BuildContext context) {
    return Scaffold(
      appBar: AppBar(title: const Text('Feature Flag Demo')),
      body: Center(
        child: Text(
          '🚀 New Dashboard UI Enabled!',
          style: TextStyle(fontSize: 24, color: Colors.green),
        ),
      ),
    );
  }
}
Feature Flagging with Intellitoggle
Brings everything together, open lib/main.dart file and update the code.
import 'package:flutter/material.dart';
import 'package:flutter_dotenv/flutter_dotenv.dart';
import 'package:provider/provider.dart';
import 'providers/feature_flag_provider.dart';
import 'ui/default_ui.dart';
import 'ui/new_ui.dart';

Future<void> main() async {
  WidgetsFlutterBinding.ensureInitialized();
  await dotenv.load(fileName: ".env");

  runApp(
    MultiProvider(
      providers: [
        ChangeNotifierProvider(create: (_) => FeatureFlagProvider()),
      ],
      child: const MyApp(),
    ),
  );
}

class MyApp extends StatefulWidget {
  const MyApp({super.key});

  @override
  State<MyApp> createState() => _MyAppState();
}

class _MyAppState extends State<MyApp> {
  @override
  void initState() {
    super.initState();

    // Delay async provider call until after first frame
    WidgetsBinding.instance.addPostFrameCallback((_) async {
      final provider =
          Provider.of<FeatureFlagProvider>(context, listen: false);
      await provider.loadFlag();
      if (mounted) setState(() {}); // only rebuild if widget is still mounted
    });
  }

  @override
  Widget build(BuildContext context) {
    final flagProvider = Provider.of<FeatureFlagProvider>(context);

    if (flagProvider.isLoading) {
      return const MaterialApp(
        home: Scaffold(
          body: Center(child: CircularProgressIndicator()),
        ),
      );
    }

    return MaterialApp(
      debugShowCheckedModeBanner: false,
      home:
          flagProvider.isEnabled == true ? const NewUI() : const DefaultUI(),
    );
  }
}
Testing Intellitoggle Feature Flags in Flutter App
After following through each of the previous sections to create a Flutter application with Intellitoggle feature flag, it’s time to test everything we have done.
Run the Flutter app from the root directory of your project using the command below:
flutter run
Your terminal should look something like this:
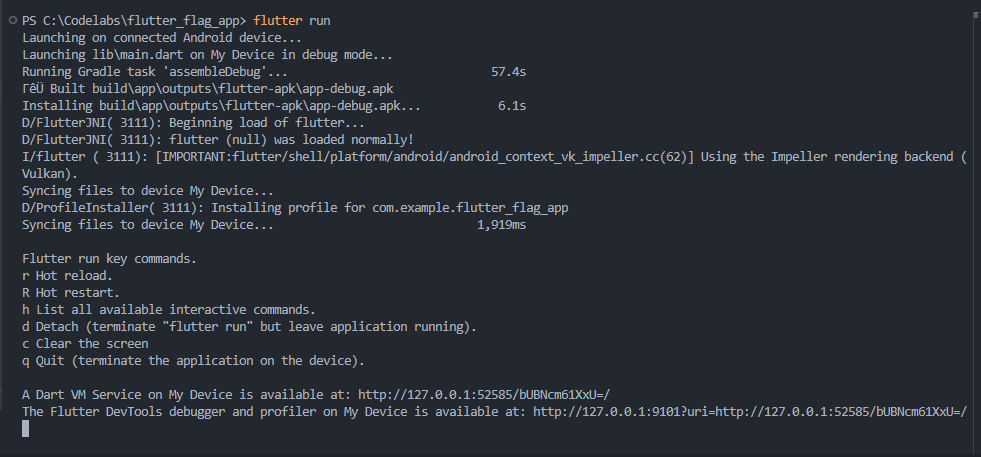
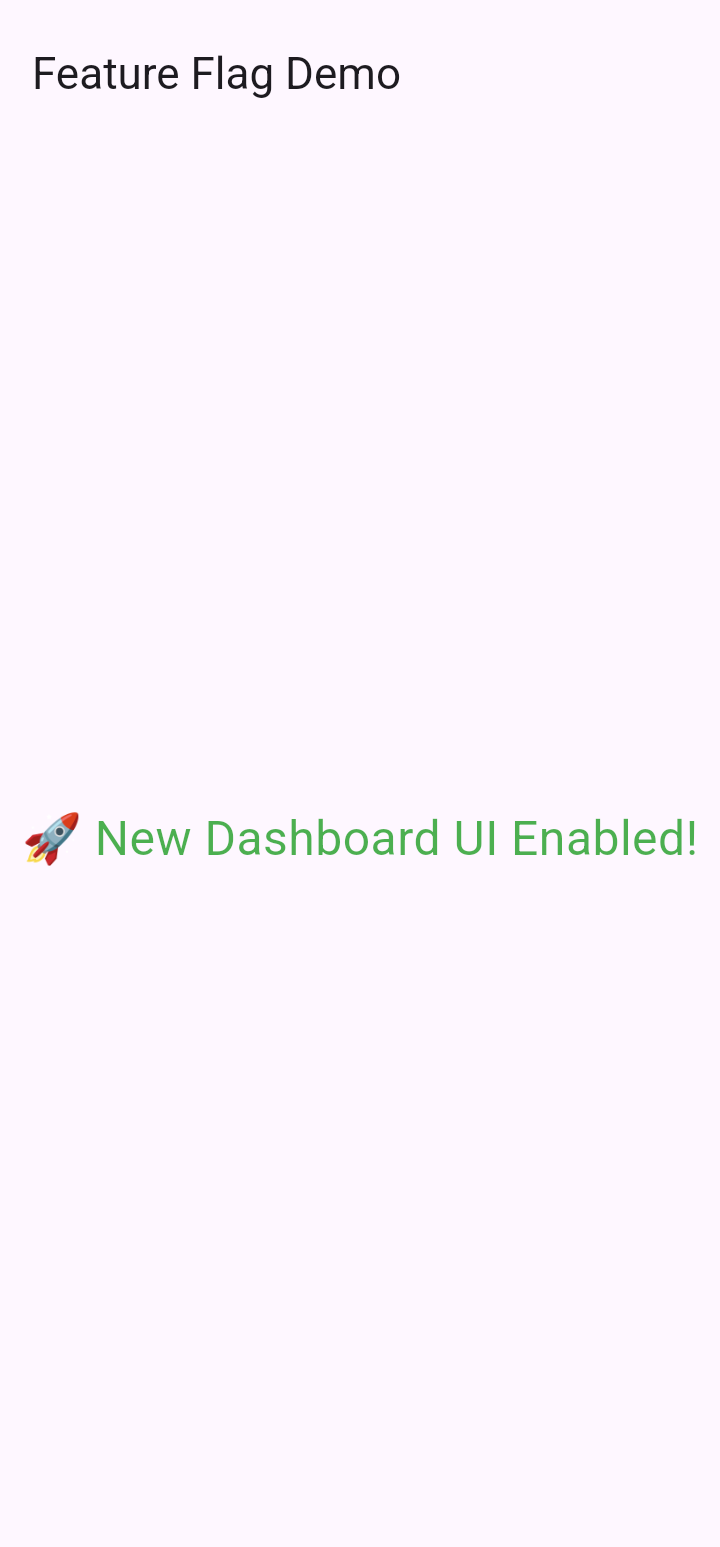
The Flutter app should launch in debug mode. This should show you the Feature Flag Demo with New Dashboard Enabled as shown in the screenshot below:
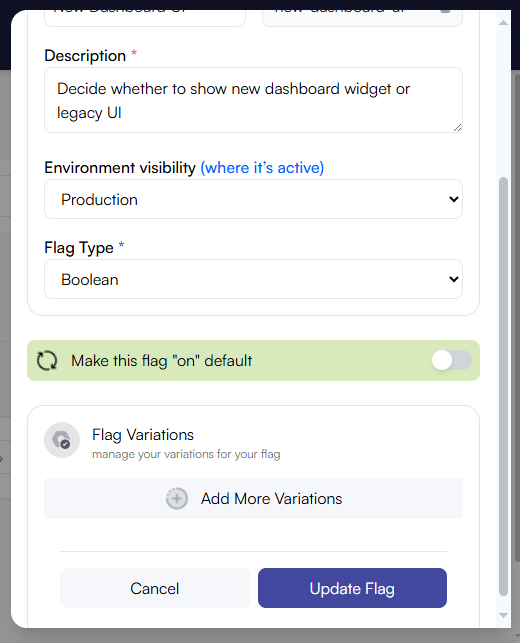
Proceed by testing the feature flags switch on Intellitoggle to toggle the Default Value off:
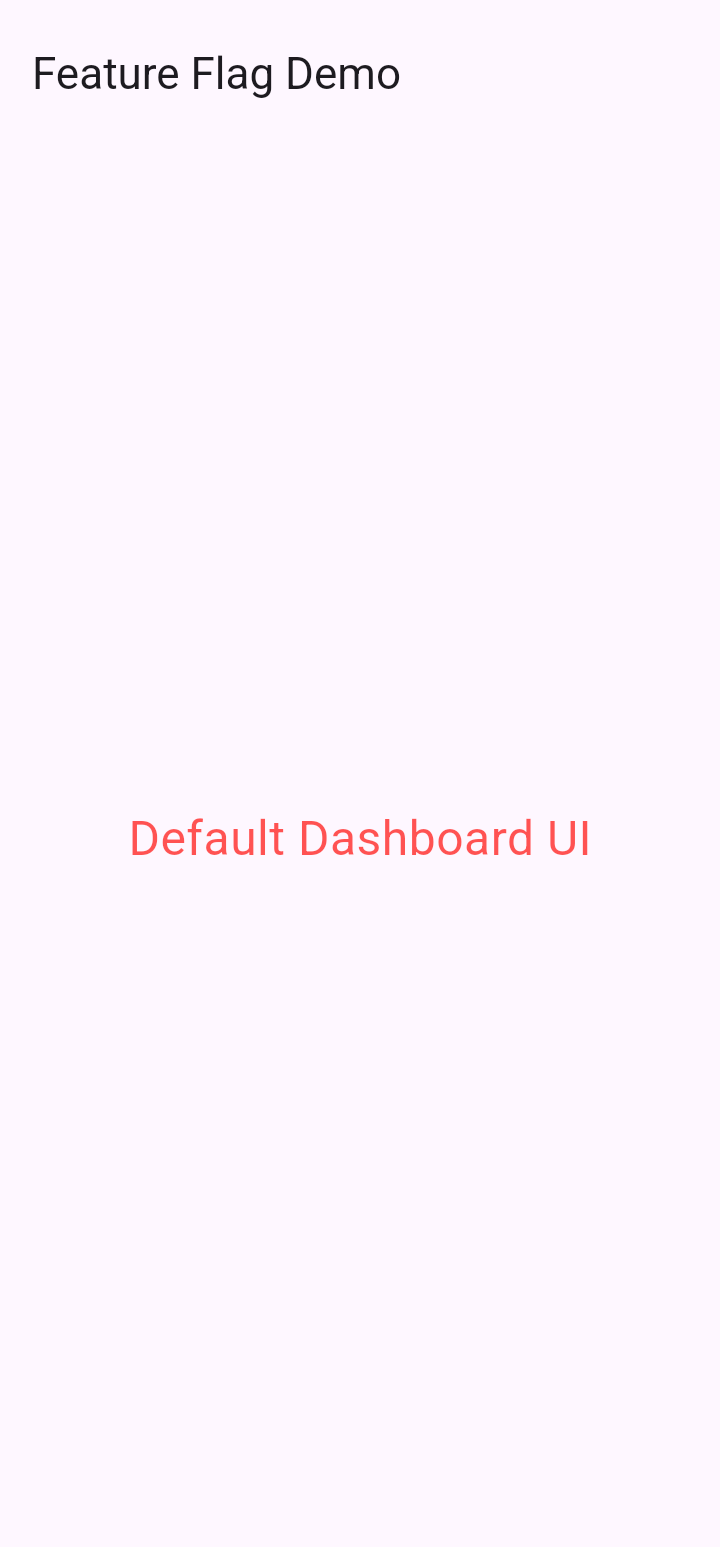
Flutter app will display the Default screen:
Now, test again by toggling the Default value on:
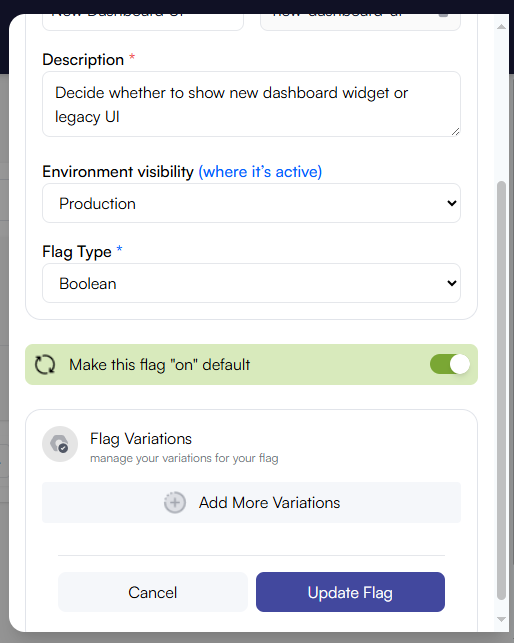
Flutter app will display the New Dashboard screen:

Conclusion
We’ve just seen how to implement Flutter feature flags on a simple UI screen using IntelliToggle. This concept can be applied easily to any application. With feature flags, new features can be released safely and controlled confidently allowing you to turn them on or off instantly without deploying new code.
The key advantage is safety and speed. If an issue arises, you can disable the feature immediately; no need to resubmit the app to the Google Play Store or Apple App Store, or wait for lengthy review and update processes.
This article demonstrated the power of feature flags through a simple example, enabling and disabling a UI dashboard. However, the possibilities go far beyond that. With IntelliToggle, feature flags aren’t limited to booleans; they can also hold string, number, or JSON values for greater flexibility and control.
